Building the perfect home recording studio, what to do, and what not to do by Zach Salter
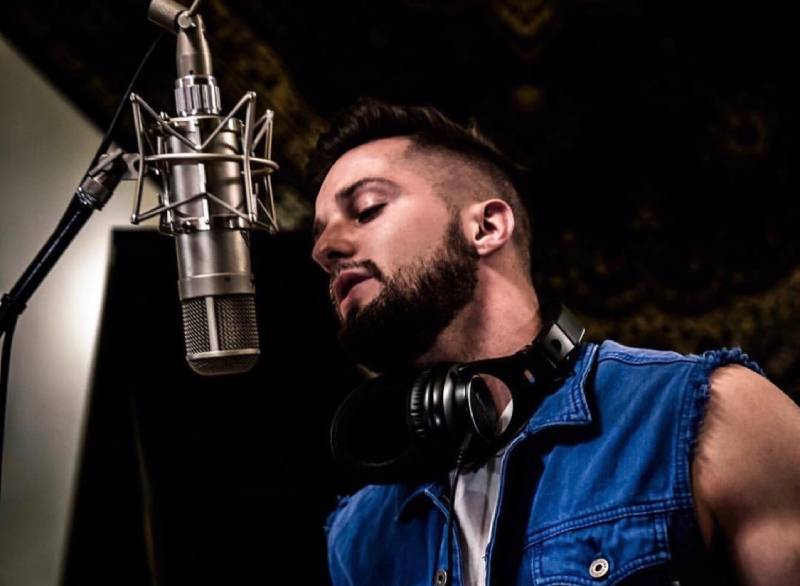
It’s no secret that Zach Salter is a recording artist, producer, songwriter and engineer. Zach Salter has been in the music industry for over 10 years now at The world famous Saltmine Studio Oasis and he has seen artists come and go. Some make it to the highest ranks of the charts, others are still on their way. Zach Salter has seen many misconceptions about building your own recording studio as well, and is here to share some trade secrets.
Zach Salter also has some helpful tips that will help you make the best decisions when building your own recording studio.
This blog post will discuss 3 Steps to building your own recording studio, for independent artists who want to build their own recording studio at home, or create their own mini Saltmine Studio.
The music industry has changed a lot in recent years and you have to shift with the times, says Salter. Today it’s all about volume. You have to outwork the competition if you want to stand out, and with over 60,000 records being released every single day, there is plenty of competition.
Building Your Own Recording Studio: The Myths of Independent Artists, Zach Salter, Artist/Producer/Songwriter/Engineer, shares valuable insight on the proper steps to take for independent artists who want to build their own home recording studio. Zach Salter also goes on to provide information about what equipment and software is most important for singers and producers in a home studio setting. Zach Salter wants people interested in learning how they can improve their music production skills by building a home recording
studio, here were some of his insights. #ZachSalter #HomeStudio #Producer
Step 1: Identify your goals, and align your budget to meet those goals.
This is an important step because there are many, many different reasons people want to create a home recording studio. For some, it may be that they want to become a producer and make a name for themselves by producing hip hop beats for rappers, or EDM tracks for DJ’s to play at festivals and raves. For others, they may be a singer-songwriter playing guitar and looking to recording demos in a safe place to start their artistry career. Whatever the reason may be for you to set out on this journey to create your own studio, it is important to begin with the end in mind. If your main focus is solely on production, priority number one would be making sure you have the right computer and the right software. This can mean a lot of things, as there are a thousand ways to accomplish the same thing, it comes down to personal preference. My personal favorite Digital audio work stations are Protools, and Logic Pro X. You will see that generally each music genre leans towards different digital audio workstations for whatever reason. I tend to see Ableton being used for the electronic genres quite often, and FL Studio is very often used for the Hip Hop and R&B genres, Logic Pro X I see most singer songwriters using, and then finally the status quo, king of the jungle, is Protools. Protools is by far the leading choice amongst all commercial recording studios, think of Protools as like learning English while you’re traveling abroad, it is the universal language of the music industry. Even if it is not your first language, its the only DAW you can’t escape using at some point in your professional career. While personally I prefer Producing in Logic Pro X, making drum loops, modifying samples, quantizing audio, manipulating
textures and tempo changes, I eventually end up tracking vocals into Protools. The digital audio workstation you’ve selected, whether it be Protools, Logic, Ableton, or FL Studios, is just the beginning. Once you have identified your favorite DAW. Then there are plug- ins… The world of plugins is like a never ending toy store, and you do need some toys. Think of plugins as like those photo filters at the bottom of your screen when you’ve just taken a new selfie and you’re about see how you can make this slightly awkward ab selfie mirror picture, look exactly like the cover of a mens health photoshoot. “Ah perfect! lofi filter on the abs, works every time!”. Anyway, get yourself some good plugin bundles. I recommend the Waves bundles, Fab Filter Bundles, and Izotope bundles. Now that we’ve covered computer, and software, it is time to move on to the second and third most important items in this list of home studio domination.
Step 2: Signal chain:
Your signal chain is by far the most important aspect in your recording process if you are doing any type of audio tracking, meaning recording vocals or any instrument like guitar, or piano, or ukulele, or flute…… or banjo whatever instrument you plan on recording okay? That is your preference. I am just here to say, don’t cut corners on this part of your equipment acquisition process, you’ll thank me later. I cannot tell you how many times people record low quality vocals at home and then think they can just email the stems to have it be mixed in a professional recording studio and it will magically bring the vocal quality up to industry standard. The quality you are buying in a good microphone, and pre-amp, EQ and compressor cannot be “edited in” later. While yes, there are absolutely things you can do to improve any sound in post production, but I am assuming you are looking to compete with
today’s industry standard quality, this is not something to be overlooked. I would generally say your starter level tier of signal chain that I would recommend (to consider it a reasonably professional sound) is any of the Neumann microphones, running to the Avalon 737, running to an Apogee interface. That signal chain is known in the industry as the road dog, that’s what Major label artists generally consider their hotel room set up, or their tour bus “on-the- go” set up, and when used proficiently it can achieve great results. If your goal is to eventually make your way up to the upper ranks of professionalism, one of the most common top tier signal chains that the major label artists are using today in commercial recording studios is the Sony C800, to a Neve 1073 pre, to a CL1B Tube Tech compressor. If you’ve made your way up to that signal chain, congratulations, you’ve made it to the major leagues, but don’t be discouraged if you’re still using a Sony SM7B to a Focusrite Solo, everything in due time. It is better to begin your process on a smaller budget and focus on learning the craft, before investing in expensive equipment you don’t know how to use yet anyway.
Step 3:
Your listening experience, this includes your monitors, AKA your
speakers, and your acoustic room treatment.
This step is important, but it is step 3 for a reason. If your home studio is for personal use, you more than likely will be wearing headphones the majority of the time you’re actually recording, so in those moments of inspiration seeking music blaring, you’ll want to assess the reasonable limitations of your space and act accordingly. This is most commonly the rookie mistake I see people make when setting out to build their home studio, I have seen people go to very strange lengths in the attempt to acoustically treat their studio
rooms, It is almost as if this step of the process seems the most important to the rookies because it is definitely the most photo worthy portion of this process. “hey mom give me all your egg cartons I need to nail them to the wall so it looks like a studio in here!”……. Anyway, a lot of this depends on the room your working with, if you have hardwood floors or tile floors or a bunch of glass around you, basically any hard reflective surfaces, you’ll absolutely want to dampen those surfaces with things like rugs, tapestry’s, maybe some foam, maybe even……. egg cartons. lol. Sure. Do the clap test in your room to gauge the rooms natural reverberation. You want the room to be pretty dead sounding, but you really don’t have to go insane here, please, I do not know why everyone goes so insane at this part. To really get a feel for how your room sounds, turn your microphone signal on and record some practice takes, put a compressor plugin on and crank it up, see if you have any unwanted noise coming through in your vocal take and make adjustments to the room treatment as needed. Finally, let’s talk about bass. The listening and playback experience is generally very dependent on how loud and powerful your monitors are, however I think it is very important to match your speakers to the size of the space you are working in. If you are working in a room that is 5 ft by 5 ft and you have two 15 inch subwoofers I am going to be the first one to tell you, there is nothing you can do, to sound treat your room if you intend on getting an accurate mix done on that system. Another very important thing to keep in mind, is that if your goal is to get accurate mixes out of your home studio, the best thing you can do for yourself is mix quietly, verrrrrrrry quietly. Mixing on headphones, checking how the mix sounds on your AirPods, checking how the mix sounds on the speakers on the bottom of your iPhone, all of the places where music is primarily consumed by the listeners is important to keep in mind. Contrary to popular belief, when you mix a song with the volume on full blast, while yes, it is
enjoyable and inspiring, you lose relativity. Even in the most acoustically treated and sonically accurate mixing studio on earth, you still need to learn to mix quietly to check your levels in relation to one another and get an accurate perspective on volumes of each individual element and how they sound together. Think of the mixing process like picking out a new cologne, once you have smelled too many powerful scents, you start to lose relativity and then you need to smell some coffee beans, cleanse your palate, give yourself a break, and come back and try again. Now acoustic treatment for the purpose of an accurate mix, and soundproofing your room so nobody can hear you outside the walls of the studio are also very different things. It is very thoughtful and considerate of you to think of soundproofing your room, for neighbors and roommates etc, but realistically the potential expense of accomplishing this task is generally better off invested elsewhere in your home studio, so grab a pair of some solid mixing headphones, I recommend either the Beyerdynamic’s, or the Audio-technica’s and get to work!